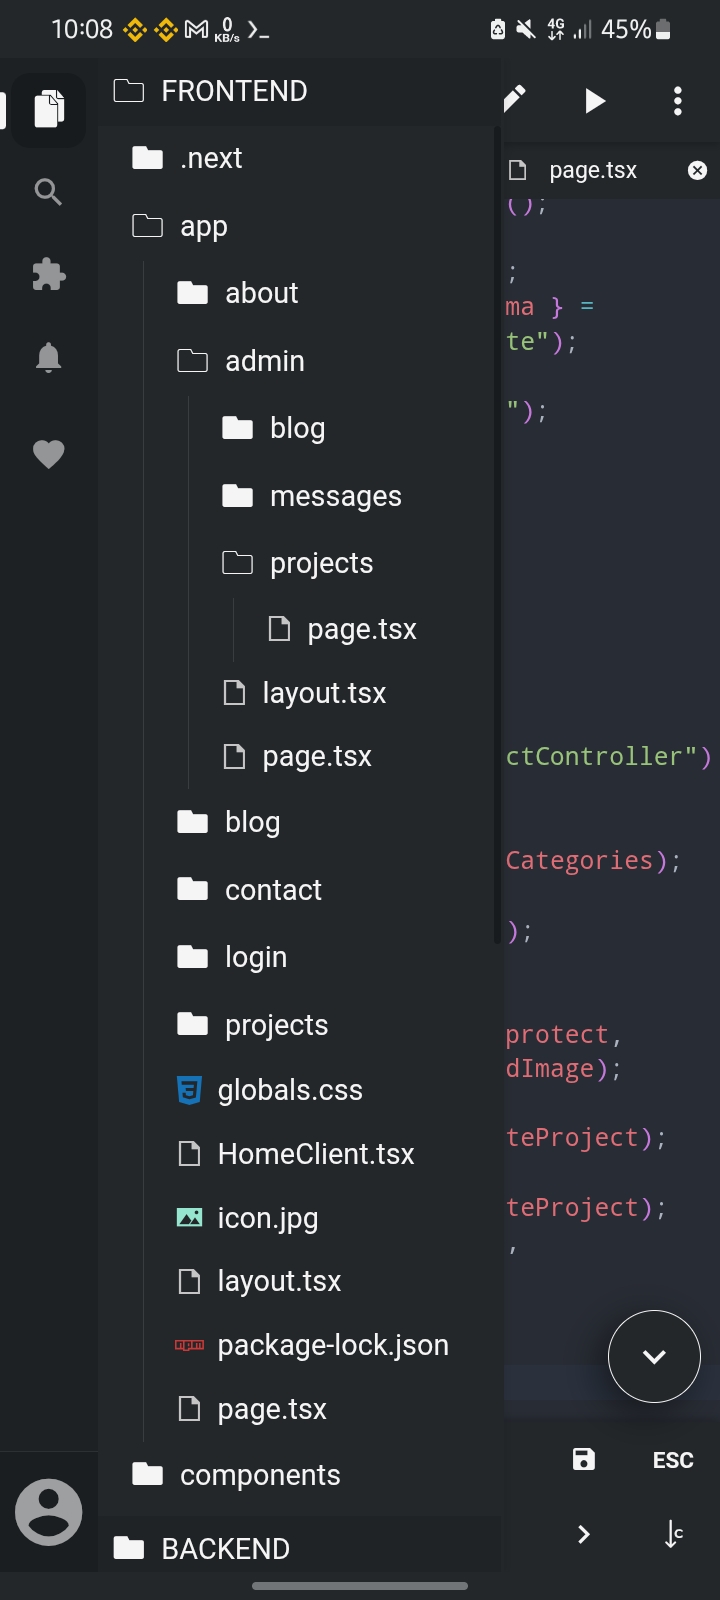
How I Kept Building Full-Stack Apps After My Laptop Died — Using Only My Android Phone
Why I Needed This Setup
My laptop suddenly stopped working. Like most developers, I relied on it for everything: writing code, running Node.js projects, Git and GitHub, Next.js development, backend APIs, and VS Code.
Without a PC, I still needed to keep improving my portfolio and working on my projects. Fortunately, I had three things: an Android phone, an internet connection, and a GitHub account.
The challenge became simple to state and hard to answer:
Can I build, edit, run, and deploy full-stack applications using only my phone?
The answer turned out to be yes — with a few compromises along the way.
The Tools I Settled On
After trying different combinations, three tools formed the core of my setup:
- Termux — a Linux environment for Android that became my terminal
- Acode — a lightweight, VS Code-style code editor for Android
- GitHub — my remote repository, used exactly as it would be from a PC
Termux
Termux gives you a real Linux environment on Android. Through it, you can install Git, Node.js, npm, SSH, Python, GCC, and a long list of standard Linux utilities. This became my terminal for everything — cloning repos, running dev servers, and managing Git.
Acode
Acode became my code editor — think of it as a lightweight VS Code built for Android. It supports syntax highlighting, tabs, search, a Git plugin, an integrated terminal, and plugin support.
GitHub
GitHub didn't change at all. Code continued to be pushed and pulled exactly as it would from a laptop.
Step-by-Step Setup
Step 1 — Install Termux
Install the latest version of Termux, then update it:
pkg update
pkg upgrade
Install the tools you'll need:
pkg install git
pkg install nodejs
pkg install openssh
Verify everything installed correctly:
git --version
node -v
npm -v
Step 2 — Configure Git
Tell Git who you are:
git config --global user.name "your_username"
git config --global user.email "you@example.com"
Verify the configuration:
git config --list
Step 3 — Generate an SSH Key
Instead of HTTPS authentication, use SSH. Generate a key:
ssh-keygen -t ed25519 -C "you@example.com"
Press Enter through every prompt to accept the defaults. Then display the public key:
cat ~/.ssh/id_ed25519.pub
Copy the entire output.
Step 4 — Add the SSH Key to GitHub
- Open GitHub
- Go to Settings → SSH and GPG Keys → New SSH Key
- Paste the copied key
- Save
Step 5 — Test the SSH Connection
Run:
ssh -T git@github.com
The first time, you'll be asked:
Are you sure you want to continue connecting?
Type
yesHi username! You've successfully authenticated...
At this point, GitHub authentication is complete.
Step 6 — Clone Your Repository
Initially, I cloned using HTTPS:
git clone https://github.com/user/project
Git asked for a password, and authentication failed. The reason: GitHub removed password authentication for Git years ago.
Solution — use SSH instead:
git clone git@github.com:user/project.git
Problem solved.
Step 7 — The SD Card Storage Experiment (and Why I Abandoned It)
Since internal storage is limited, I wanted to store my projects on the SD card. Termux exposes the SD card at
~/storage/external-1Problem 1 — Acode couldn't open the project. Although Termux could see the repository, Acode couldn't. Android's storage restrictions prevent apps from freely accessing directories owned by other apps, so the repo existed but my editor couldn't reach it.
Problem 2 — Confusing storage paths. Inside Termux,
~/storage/external-1readlink -f ~/storage/external-1
revealed something surprising — it actually pointed to:
/storage/XXXX-XXXX/Android/data/com.termux/files
That's not the SD card root. It's Termux's own private sandbox on the SD card, which explains why file managers couldn't find my cloned repositories either.
Solution — move the repository back into Termux's home directory:
mv ~/storage/external-1/project ~/
Now the project lived at
~/projectLesson learned: storing projects on the SD card looks attractive, but Termux's private storage and Android's permission model create unnecessary complications. Keeping repositories inside
~/projectStep 8 — Opening the Project in Acode
- Open Acode
- Choose Open Folder
- Navigate to Termux Home → portfolio
The project opens normally.
Step 9 — Running npm
I first ran:
npm run dev
...and immediately got:
next: not found
The reason was simple — dependencies hadn't been installed yet.
Solution — install packages:
npm install
This downloads hundreds of packages and creates a
node_modulesProblem — Missing Android SWC Binary
Running
npm run devFailed to download @next/swc-android-arm64 404
The project was using Next.js 14.1.0, which referenced an Android binary that no longer exists.
Solution — upgrade Next.js:
npm install next@latest
The missing package error disappeared.
Problem — Turbopack Unsupported
Next.js now started, then failed again:
Turbopack is not supported on android/arm64
Next.js itself suggested the fix — use Webpack instead:
next dev --webpack
Or update your
package.json"scripts": { "dev": "next dev --webpack" }
After that, the development server launched correctly.
Running Backend and Frontend Together
Just like on a PC — open two terminal sessions:
# Terminal 1
cd backend
npm install
npm run dev
# Terminal 2
cd frontend
npm install
npm run dev
Both run independently, side by side.
Viewing Localhost on Android
Once Next.js starts, you'll see
http://localhost:3000http://127.0.0.1:3000Advantages of This Setup
- Continue coding without owning a PC
- Full access to GitHub repositories
- Push and pull code normally
- Run Node.js and Express servers
- Run Next.js projects
- Edit code from anywhere
- Great battery life
- Completely portable
Disadvantages of Using Acode's Built-In Terminal
Acode is an impressive editor, but its integrated terminal is not a replacement for Termux. Here's what tripped me up:
- A separate Linux environment. Acode Terminal runs inside its own Alpine Linux sandbox, completely separate from Termux — meaning separate SSH keys, separate Git configuration, separate installed packages, and a separate filesystem. Everything has to be configured twice.
- Duplicate installations. Git and Node installed in Termux aren't available inside Acode's terminal, and SSH keys don't carry over.
- A different package manager. Instead of
, Acode's terminal usespkg install
— which can be confusing if you're used to Debian or Ubuntu tooling.apk add - Permission issues. Because Acode runs in its own sandbox, sharing files with Termux is inconvenient and adds unnecessary complexity.
- Harder debugging. Most tutorials online assume Termux. Few cover Acode's isolated environment, so troubleshooting often comes down to trial and error.
My Recommendation
After hours of experimenting with both environments, here's what worked best:
- Use Termux as your development environment. Install Git, Node.js, npm, and SSH there, and run your servers from it.
- Use Acode only as your editor. Open the project from your Termux home directory and edit files there.
This avoids duplicate configurations, keeps everything inside one Linux environment, and is far easier to maintain.
Final Thoughts
What started as an unfortunate hardware failure became an opportunity to learn something new. Developing on Android isn't as convenient as using a desktop, but it's far more capable than most developers realize. I was able to clone repositories, configure Git and SSH, install dependencies, run Next.js, and keep working on a real full-stack project — all from a phone.
If you're a student, a developer between devices, or simply curious about mobile development workflows, don't let the lack of a PC stop you. With patience, a few tools, and a willingness to troubleshoot, your Android phone can become a surprisingly capable development machine.
And if you run into the same problems I did, hopefully this guide saves you a few hours.